Showing posts with label supervised learning. Show all posts

Tuesday, December 27, 2022

Auto Tagging Invoices Using Azure AI Cognitive Services in 5 Minutes


In a previous blog post we covered SharePoint Syntex for auto tagging invoices by using a content type, which can be found here SharePoint Syntex in 5 Minutes. Sometimes there needs to be more processing outside of SharePoint before the document can be uploaded or external systems must be accessed for metadata properties. This kind of functionality can become very complex when trying to use a Power App or Flow to accomplish this. Microsoft provides AI services for reading invoices that can be read and then used for the business logic that goes beyond what Syntex can do. These services are a consumption based API in Azure that allows uploading invoices for processing to return the same metadata results that can be found in SharePoint Syntex.


Setting up Azure
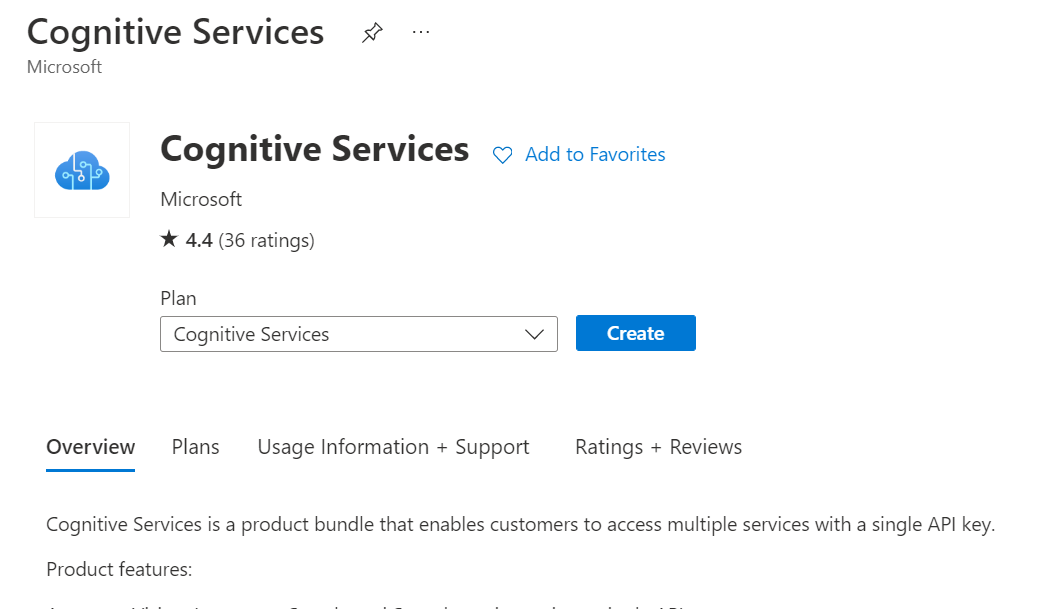
1) Create a Cognitive Services Plan


2) Once the cognitive services is created, there is a list of several services including form services. Selecting this will open up the form studio which allows for uploading and reviewing the forms the service will be used for training.


3) Since this is a 5 minute tutorial, I will be using the prebuilt invoice recognizer.


4) Since this is a prebuilt model it comes with several examples already loaded. By clicking the "Analyze" button, the invoice will highlight all the points of interest and assign it metadata. This screen is verry similar to the SharePoint Syntex screen seen in my previous blog SharePoint Syntex in 5 Minutes


5) To make sure this predefined model works for your invoices, select the upload in the top left corner and then upload a sample invoice.


6) Finally, a storage account for the invoice service to access documents must be created. Our invoice service must be able to access the files they must be made available. For this demo, I will be making my blob storage available to the internet. For security reasons DO NOT DO THIS IN PRODUCTION. For a production environment you will want to setup a network for your AI service that is connected to your blob storage for secure access. For details on how to create a storage account, see my pervious blog post Create an Azure Document Queue for Loading and Tagging SharePoint Documents - Part 1


Consuming the service

For this example, I created a WPF app to display our uploaded invoice and its associated properties. To begin, 4 NuGet packages must be installed.

These 2 are needed for the form recognition service, the form recognizer API reading the invoice and the Azure storage blob API for exposing the invoice.


Azure.AI.FormRecognizer
Azure.Storage.Blobs

The other 2 NuGet packages needed are for drawing our invoice. PdfLibCore will be used to convert the PDF into an Image and System.Drawing.Common will be used for drawing the image. It is important to note that this example was done on Windows. System.Drawing may not be Linux/Mac compatible.


System.Drawing.Common
PdfLibCore

The app layout is a simple grid system made up of 3 rows. One for uploading an invoice, the other for displaying it's properties, and then the bottom row for any errors while uploading.


<window height="1000" mc:ignorable="d" title="Five Minute Invoice Tagger" width="1600" x:class="FiveMintueInvoiceTagger.MainWindow" xmlns:d="http://schemas.microsoft.com/expression/blend/2008" xmlns:local="clr-namespace:FiveMintueInvoiceTagger" xmlns:mc="http://schemas.openxmlformats.org/markup-compatibility/2006" xmlns:x="http://schemas.microsoft.com/winfx/2006/xaml" xmlns="http://schemas.microsoft.com/winfx/2006/xaml/presentation">
    <grid>
        <grid.columndefinitions="">
            <columndefinition width="500"></columndefinition>
            <columndefinition width="1100"></columndefinition>
        </grid>
        <grid.rowdefinitions="">
            <rowdefinition height="50"gt;</rowdefinition>
            <rowdefinition height="750"gt;</rowdefinition>
            <rowdefinition height="750"gt;</rowdefinition>
        </grid>
        <stackpanel grid.column="0" grid.row="0">
        <label content="Select an invoice...">
        <button click="UploadFile_Click" content="Select Invoice">
        </button></label></stackpanel>
        <image grid.column="0" grid.row="1" height="800" name="InvoiceImage" width="450">
    <datagrid grid.column="1" grid.row="1" height="800" name="DocumentProperties" width="1050">
    <label grid.column="0" grid.row="2" name="ErrorMsg">
    </label></datagrid></image></grid> 
</window>

Next, an object is needed to hold our invoice properties for displaying the results. This class has 3 items, the Field's name, the Field's Value, and the confidence score that the API grabbed the right information.


public class InvoiceProperty
{
	//Field name found on invoice
	public string Field {get;set;}
	//Field value
	public string Value {get;set;}
	//How confident AI is that field value is correct
	public string Score {get;set;}
}

References to the NuGet packages must be added to the project, along with some other using statements for displaying the invoice image.


using System;
using System.Collections.Generic;
using System.IO;
using System.Threading.Tasks;
using System.Windows;
using System.Windows.Media.Imaging;
using Azure;
using Azure.AI.FormRecognizer.DocumentAnalysis;
using Azure.Storage.Blobs;
using PdfLibCore;
using PdfLibCore.Enums;

A click event is added to the upload button to grab the invoice and process the request. This method is async so a loading screen should be added. Since this a 5 minute application it has been omitted.


private async void UploadFile_Click(object sender, RoutedEventArgs e)  
{  
	try
	{
		ErrorMsg.Content = "";

		//we only want pdf invoices
		Microsoft.Win32.OpenFileDialog openFileDlg = new Microsoft.Win32.OpenFileDialog(); 
		openFileDlg.Filter = "Pdf Files|*.pdf";
		// Launch OpenFileDialog by calling ShowDialog method
		Nullable result = openFileDlg.ShowDialog();
		// Get the selected file name and display in a TextBox.
		// Load content of file in a TextBlock
		if (result == true)
		{
			//Upload to azure blob so Azure AI can access file
			string invoicePath = await UploadInvoiceForProcessing(openFileDlg.FileName);

			//perform Invoice tagging
			Task> invoicePropertiesTask = GetDocumentProperties(invoicePath);

			//Convert PDF to image so we can view it next to properties
			UpdateInvoiceImage(openFileDlg.FileName);

			//Wait for Azure to return results, set it to our data grid
			DocumentProperties.ItemsSource = await invoicePropertiesTask;

		}
	}
	catch(Exception ex)
	{
		ErrorMsg.Content = ex.Message;
	}
}

In our button event, there are 3 functions called One for uploading the invoice to Azure, one for processing the invoice, and one for converting the image. Our upload function will upload the invoice to Azure Blob Storage to make the invoice available to the Azure Form Recognizer Service. Again, in a production environment make sure your blob storage is not publicly available. 


private async Task UploadInvoiceForProcessing(string FilePath)
{
	string cs = "";
	string fileName = System.IO.Path.GetFileName(FilePath);
	Console.WriteLine("File name {0}", fileName);
	//customer is the name of our blob container where we can view documents in Azure
	//blobs require us to create a connection each time we want to upload a file
	BlobClient blob  = new BlobClient(cs, "invoice", fileName); 

	//Gets a file stream to upload to Azure
	using(FileStream stream = File.Open(FilePath, FileMode.Open))
	{
		var blobInfo = await blob.UploadAsync(stream);
		
	}
	
	return "blob base storage url" + fileName;
}

Next the invoice URL is passed to the Form Recognizer Service for processing


private async Task> GetDocumentProperties(string InvoicePath)
{
	
	List invoiceProperties = new List();

	//Endpoint and key found in Azure AI service
	string endpoint = "ai service url";
	string key = "ai service key";
	AzureKeyCredential credential = new AzureKeyCredential(key);
	DocumentAnalysisClient client = new DocumentAnalysisClient(new Uri(endpoint), credential);

	//create Uri for the invoice
	Uri invoiceUri = new Uri(InvoicePath);

	//Analyzes the invoice
	AnalyzeDocumentOperation operation = await client.AnalyzeDocumentFromUriAsync(WaitUntil.Completed, "prebuilt-invoice", invoiceUri);
	AnalyzeResult result = operation.Value;

	//iterate the results and populates list of field values
	for (int i = 0; i < result.Documents.Count; i++)
	{
		AnalyzedDocument document = result.Documents[i];
		foreach(string field in document.Fields.Keys)
		{
			DocumentField documentField = document.Fields[field];
			InvoiceProperty invoiceProperty = new InvoiceProperty()
				{
				  Field = field,
				  Value = documentField.Content,
				  Score = documentField.Confidence?.ToString()
				};

				invoiceProperties.Add(invoiceProperty);
			}
	}

	return invoiceProperties;
}


While the invoice is being processed, the application will convert the PDF to an image to be displayed in the application. The form recognizer service returns references for the PDF to draw the bounding boxes of the data found which could be used to draw onto the image.


 private void UpdateInvoiceImage(string FilePath)
{
	using(var pdf = new PdfDocument(File.Open(FilePath, FileMode.Open)))
	{
		//for this example we only want to show the first page
		if(pdf.Pages.Count > 0)
		{
			var pdfPage = pdf.Pages[0];

			var dpiX= 600D;
			var dpiY = 600D;
			var pageWidth = (int) (dpiX * pdfPage.Size.Width / 72);
			var pageHeight = (int) (dpiY * pdfPage.Size.Height / 72);
		
			var bitmap = new PdfiumBitmap(pageWidth, pageHeight, true);                                

			pdfPage.Render(bitmap, PageOrientations.Normal, RenderingFlags.LcdText);
			BitmapImage image = new BitmapImage();
			image.BeginInit();
			image.StreamSource = bitmap.AsBmpStream(dpiX,dpiY);
			image.EndInit();
			InvoiceImage.Source = image;
		}
		
	}
}


Once this is completed your application will display the invoice with the properties found with an application created in 5 minutes.


To view the full code, please visit the Five Minute Coder GitHub here: Five Minute Invoice Tagger


Friday, October 14, 2022

Getting Started with SharePoint Syntex in 5 Minutes


SharePoint is a tool that empowers business users to setup and design sites with little or no code knowledge. Using tools like SharePoint Designer to create workflows, or the new Power Automate and Power Apps tools, the barriers for creating robust applications have been removed. With everyone looking to incorporate AI into their business, SharePoint has come and provided several low code solutions with their Power Platform tools, such as users can create sentiment analysis tools, language detection, and even text translation apps using the platform. There is still a barrier into the Power Platform that requires some logic to design and query resources, but those with an understanding of Excel formulas should find the process similar.

Any SharePoint architect will tell you that metadata is important for creating well structure search schemas, but sometimes the amount of meta data needed is cumbersome to end users. What if a way to extract and auto tag documents is needed, there must be an easier way than a power app to achieve this, which is where SharePoint Syntex comes in. SharePoint Syntex can be thought of as a content type hub that allows for auto tagging of documents by just uploading the document to a library.

It is important to know before using SharePoint Syntex, you must purchase an additional license for each user using the service and Power Automate credits. 

Setting up a Content Center

To begin using SharePoint Syntex, you must setup a content center to hold and host your Syntex content types. Just like the old content type hubs, this is done by creating a new site collection. In the SharePoint admin screen, create a new site collection and select the template "Content Center". If you do not see this option, make sure you have activated the service from the admin portal under setup then activating Automate Content Understanding. On a developer tenant the service is already available, however you will not be able to publish the content type as Microsoft will not sell you the license needed to do that on the developer tenant. 


Creating a model

Once the site is created, navigate to the site collection. To create the first understanding model, at the top you have a list of options, selecting the "Document understanding model" 


Since we are creating this in 5 minutes, I am going to use one of the preexisting models provided by Microsoft. There are 2 models; Invoices and Receipts. To train our model, we must have samples. The more samples the better the training model, your samples should also include documents that are NOT invoices to make sure it doesn't recognize them. Since we are using the prebuilt model our content type is setup with invoice fields (invoice number, date, amount, etc). To use a custom understanding model you will create columns and then highlight on the document where the data is found for the extractor to learn what to look for. This will be covered in a later blog post.


The screen for our model is pretty straight forward, the first step in the process is to analyze our files. To do this, you will upload the samples mentioned above.


In the analyze section we will see a document library to hold the files used for analyzing and training, only upload the documents that are invoices as the analyzing step is confirming data is being found correctly. Click add at the top upload your documents.


With your samples loaded, highlight the ones you want to analyze and click add.


Now at the bottom of your library, click next to start the analyzation of the documents.


Clicking next will start the analyzing process. Once complete, a screen with the document and the properties found show up. This is where you tell Syntex if it found the correct items and that they should be extracted. clicking each item under extractor Syntex will ask you if it is the correct extractor. Saying yes can happen two ways either selecting yes for each extractor, or clicking the extract check box. clicking no will flag the extractor as wrong so anything that is not found correctly select no from the popup. Once complete hit next at the bottom of the screen


The invoice SharePoint Syntex Extractor is complete.  The final step would be to apply the extractor to a library.


To make sure you model works on other documents and does not work on documents it shouldn't additional files can be added to the "Training Files" library, and when we run the extractor we can see the prebuilt model only finds the business name, which to me shows the model is ready for production. if dates or items were found that should not match, more training items are needed.


SharePoint, SharePoint Syntex, AI, Artificial Intelligence, NLP, Natural Language Processing, Syntex, supervised learning, Microsoft, O365, Office 365, SharePoint Online

Tuesday, October 6, 2020

Get Started with ML.NET in 5 Minutes


What is ML.NET

ML.NET is a dot net based machine learning language created by Microsoft. It allows us to use C# to quickly create various machine learning algorithms using built in training methods. ML.NET also has a way to extend to the language to tap into other machine learning platforms such as TensorFlow for actions that are not yet supported by ML.NET.

What is supervised learning?


Supervised learning is when we train a model with known labels for our data. The learning is supervised because we are able to give the training algorithm the correct answer for what the data represents. When training a real model, you will want a large data set representing different scenarios for your model.

Create a Supervised Learning Model in about 5 minutes.


The Data Set


For this example, we will be using the Iris Flower Species data set which can be found on the Kaggle website here https://www.kaggle.com/uciml/iris.

Create the Project


Once you have downloaded the data set, we need to create the project. Since ML.NET is so new it is worth noting that this article was written using version 1.51 and dot net core 3.1. As machine learning evolves some of these techniques may change.

To start, create a new dot net core console application called "mlnet_intro"

        dotnet new console –-name “mlnet_intro”

Now that we have our new project make sure you have the folder open, and add the nuget package "Microsoft.ML". If you are using VSCode, use CTRL+SHIFT+P to search for the package.

Data Models


We now have all the necessary components to start creating our supervised learning application. We will need 2 data models for our model one representing the Iris being fed into the model, one for displaying results. We will create our Iris model aptly named "IrisModel". 


	using Microsoft.ML.Data;

        namespace mlnet_intro
        {
            public class IrisModel
            {
                [ColumnName("Id"), LoadColumn(0)]
                public int Id {get;set;}
                [ColumnName("SepalLengthCm"), LoadColumn(1)]
                public float SepalLengthCm {get;set;}
                [ColumnName("SepalWidthCm"), LoadColumn(2)]
                public float SepalWidthCm {get;set;}
                [ColumnName("PetalLengthCm"), LoadColumn(3)]
                public float PetalLengthCm {get;set;}
                [ColumnName("PetalWidthCm"), LoadColumn(4)]
                public float PetalWidthCm {get;set;}
                [ColumnName("Species"), LoadColumn(5)]
                public string Species {get;set;}

            }
        }


Notice that we have attributes for ColumnName and LoadColumn which come from the using statement Microsoft.ML.Data. LoadColumn is the column found in our CSV, Column name is how we will refer to when training our model. This is important to remember so that our label is not part of the data being trained, in this case the column named "Species" is our label.

Next, we need to create our prediction model called "PredectionModel". Again we will have an attribute called "ColumnName" so we can map the model to our training output. Predicted Species will represent the label, and Score is the confidence levels for each label.

        using Microsoft.ML.Data;

        namespace mlnet_intro
        {
            public class PredictionModel
            {
                [ColumnName("PredictedSpecies")]
                public string PredictedSpecies {get;set;}
                [ColumnName("Score")]
                public float[] Score {get;set;}
            }
        }


Create the Iris Prediction Application


Now that we have our two models created, we can create our application that will train our AI model for predicting Iris species. In the Program.cs file we will need to create some fields for holding our model context, along with referencing the Microsoft.ML namespace. Typically this would be a separate class, but we are getting close to 5 minutes. 

    
        using System;
        using System.IO;
        using System.Linq;
        using System.Collections.Generic;
        using Microsoft.ML;
        
        
        static MLContext context;
        //model for training/testing
        static Microsoft.ML.Data.TransformerChain model;
        static IEnumerable trainingData;
        static IEnumerable testingData;
        
        static string fileName = "irisModel.zip";


With our global variables defined, the next thing we must do is train our model. In order to do that we must load our csv data, then we will split the data into training and testing data. We then need to tell our training model the columns used to represent our features and our labels, and select a training method. In this case we will use the multiclass classification trainer. Finally we want to map the predicted value back to our prediction model.


        static void TrainModel()
        {
            
            //Load data from csv file
            var data = context.Data.LoadFromTextFile("datasets_19_420_Iris.csv", hasHeader:true, separatorChar: ',', allowQuoting: true, allowSparse:true, trimWhitespace: true);
            
            //Splits data into training and testing data
            //Id is the unique key to keep labels from duplicating
            var split = context.Data.TrainTestSplit(data);
            
             
            //create data sets for trainiing and testing
            trainingData = context.Data.CreateEnumerable(split.TrainSet, reuseRowObject: false);
            testingData = context.Data.CreateEnumerable(split.TestSet, reuseRowObject: false);


            //Create our pipeline and set our training model
            var pipeline = context.Transforms.Conversion.MapValueToKey(outputColumnName: "Label", "Species") //converts string to key value for training
                .Append(context.Transforms.Concatenate("Features", new[]{"SepalLengthCm", "SepalWidthCm", "PetalLengthCm", "PetalWidthCm"})) //identifies training data from model
                .Append(context.MulticlassClassification.Trainers.SdcaMaximumEntropy(labelColumnName: "Label", featureColumnName: "Features")) //set trainer and identifies features and label
                .Append(context.Transforms.Conversion.MapKeyToValue(outputColumnName: "PredictedSpecies", inputColumnName: "PredictedLabel")); //convert prediction to string PredictedLabel is output label key for predict

            //traings the model
             model = pipeline.Fit(context.Data.LoadFromEnumerable(trainingData));


        }

In the training method, the main thing to note are the two lines "MapValueToKey" and "MapKeyToValue". What this is doing is taking our string for our label and creating a key value. This will allow our prediction model to return a string value for the Iris name instead of the numeric value.

Now that our model is trained, we want to test it against our test data and check it's accuracy. ML.Net has this build into the training model.

        static void TestModel()
        {
            //transform data to a view that can be evaluated
            IDataView testDataPredictions = model.Transform(context.Data.LoadFromEnumerable(testingData));
            //evaluate test data against trained model for accuracy
            var metrics = context.MulticlassClassification.Evaluate(testDataPredictions);
            double accuracy = metrics.MicroAccuracy;

            Console.WriteLine("Accuracy {0}", accuracy.ToString());

        }

Accuracy may vary on this since it is a small dataset, this is for learning so we are not too concerned. Next we will save and load the model to and from a file. This is helpful for re using your model in web applications or other services. 

	static void SaveModel()
        {
            IDataView dataView = context.Data.LoadFromEnumerable(trainingData);
           context.Model.Save(model, dataView.Schema, fileName);
        }

        static ITransformer LoadModel()
        {
            DataViewSchema modelSchema;
            //gets a file from a stream, and loads it
            using(Stream s = File.Open(fileName, FileMode.Open))
            {
                return context.Model.Load(s, out modelSchema);

                
            }
         }


Finally, we can now use our newly saved model to predict Iris.

	static void Predict(IrisModel iris)
        {
            ITransformer trainedModel = LoadModel();

            //Creates prediction function from loaded model, you can load in memory model as well
             var predictFunction = context.Model.CreatePredictionEngine(trainedModel);
             
            //pass model to function to get prediction outputs
            PredictionModel prediction = predictFunction.Predict(iris);

            //get score, score is an array and the max score will align to key.
            float score = prediction.Score.Max();
        
            Console.WriteLine("Prediction: {0},  accuracy: {1}", prediction.PredictedSpecies, score);

        }


Our AI setup is complete, we just need to call our newly created methods and see the results. In my example I feed the species as "hello". This is to demonstrate that the model did not cheat and use the label as a feature.

	static void Main(string[] args)
        {
        	context = new MLContext();
            Console.WriteLine("Training Iris Model");
            TrainModel();
            Console.WriteLine("Testing Iris Model");
            TestModel();
            SaveModel();

            IrisModel test = new IrisModel(){
                    SepalLengthCm = 5.2f,
                    SepalWidthCm = 3.5f,
                    PetalLengthCm = 1.4f,
                    PetalWidthCm = 0.2f,
                    Species = "hello"
                };

            Predict(test);

            Console.Read();
        }


Clone the project


you can find the full project on my GitHub site here https://github.com/fiveminutecoder/blogs/tree/master/mlnet_intro
AI, Artificial Intelligence, C#, supervised learning, dotnet, dot net, machine learning, mldotnet, ml.net, dotnet core, dotnet 5, .NET 5
C#, C sharp, machine learning, ML.NET, dotnet core, dotnet, O365, Office 365, developer, development, Azure, Supervised Learning, Unsupervised Learning, NLP, Natural Language Programming, Microsoft, SharePoint, Teams, custom software development, sharepoint specialist, chat GPT,artificial intelligence, AI

Cookie Alert

This blog was created and hosted using Google's platform Blogspot (blogger.com). In accordance to privacy policy and GDPR please note the following: Third party vendors, including Google, use cookies to serve ads based on a user's prior visits to your website or other websites. Google's use of advertising cookies enables it and its partners to serve ads to your users based on their visit to your sites and/or other sites on the Internet. Users may opt out of personalized advertising by visiting Ads Settings. (Alternatively, you can opt out of a third-party vendor's use of cookies for personalized advertising by visiting www.aboutads.info.) Google analytics is also used, for more details please refer to Google Analytics privacy policy here: Google Analytics Privacy Policy Any information collected or given during sign up or sign is through Google's blogger platform and is stored by Google. The only Information collected outside of Google's platform is consent that the site uses cookies.