Showing posts with label C#. Show all posts

Tuesday, August 8, 2023

Creating Unit Tests and Maintainable Code with Moq and NUnit in 5 Minutes


What is a Unit Test?

If you have been coding for more than 5 minutes that you have heard of the term Unit Test. You have also heard that you need to have unit tests in your code. But why do I need this test when you can attach the code to a debugger and step through all the code and verify it works. It seems like a lot of unnecessary steps and time that could be spent improving the project. While in small projects this may be true, when working with large enterprise projects with thousands of lines of code the need for unit testing becomes obvious.

As a project grows so does our dependencies on the code. For example, an email service may be referenced throughout the project. Meaning if you update the email service all the references need to be verified that they are in a working state after the change. This can add hours if stepping through each line is necessary. If an update to the code that depends on the email service changes, then all the lines of code with this dependency need to be tested as well. As you can see the chain of testing can get quite extensive.

Unit tests will ensure our code is tested and that any dependencies are still working after an update. Unit testing also allows for testing of several user scenarios that may not come up during initial development. These edge cases can be identified and tested against. This also helps with code updates since these edge cases may not be remembered. For example, you might mail all orders USPS except to those in Texas must be mailed FedEx.  However, FedEx does not deliver to PO Boxes so a unit test for testing PO Boxes is needed to ensure updates to the mail service does not break our shipments to Texas as the next person may not know this inherit knowledge about FedEx which can cause a bug down the road.

In order to cover all our test cases the method of Test Driven Development or TDD for short can be used. TDD is when test cases are created before any coding of the feature is developed. This allows for the developer to think of test scenarios and try to think of edge cases before any logic is written as the logic can skew the developer into not thinking an edge case exists. For example, a simple function called "AddNumbers" which adds two numbers together is very simple. I write the code and add a unit test that inputs 2 numbers and the test returns success. Code works but is open for bugs, what happens if I pass a letter, a null value, an extremely large number, etc. Because I didn't sit down and think of scenarios before writing my function my tests passed but I didn't cover the entire out user cases available.  There are extensions that help with this such as Fine Code Coverage that help with identifying tests that are missed, but this will only go so far if you are not thinking of the use case to handle in the first place.

Unit Testing Terms

There are many terms that refer to testing. These terms are known as "Test Doubles" or referring to what is going to be standing in place of our dependencies like an stunt double would for an actor. 

Some of the most common are Dummy, Fake, Stub, and Mock. These terms are very similar to each other and the descriptions below are how I view them. They may not fit the exact description, but the name of the test double isn't as important as that it is used.

Dummy

Data and objects just used to keep a complier from yelling at you. It has no outcome on the test itself

Fake

A fake is when an object implementation is replaced with a simpler execution and usually replaces dependencies on outside sources. For example, a SQL database call would require a SQL database, the fake would simulate this call and return objects form say a json file or in memory database.

Stub

A stub is a object that is designed to create responses that are predictable so that our test knows what to expect. When unit testing a stub is used when the object's functionality is not necessary a response is needed to complete the test. In construction, stub out is when you leave a pipe out of the dry wall and hide all the plumbing behind. All you care about is the exposed pipe. Same is true in testing, we just need a response, we do not care how the response was created.

Mock

Mocks are a step up from a stub, a stub will always return. Mocks can contain some logic to validate what is being returned. This helps when you need basic logic and null checking. These come in handy for testing edge cases and other variable cases than just the clean path a stub would provide.


Setting up a Unit Test

Planning for unit testing needs to happen at the beginning of a project. To introduce unit testing to a mature project is a large undertaking. Taking a test driven approach allows for understanding the requirements better, planning for edge cases and allows for good design practices.

Using Interfaces in C# is a must when it comes to unit testing setup and design. The interface allows for creating different dependencies for our tests than our project. This allows for stubbing and mocking our dependencies to test our code. When ever there is a dependency on another class this is an indication of a new stub. Using Inversion of Control (dependency injection) will allow for the dependencies to be swapped out for testing and not require the code to be dependent on external items.

Arrange, Act, Assert

Unit tests consist of 3 parts per test: Arrange, Act, Assert. Arrange is prepping the data for the function test. This can be initializing Mocks or Stubs, prepping data models, or initializing variables. Act is next is is executing the function that needs to be tested. Finally Assert, assert is checking that the function executed successfully and returned the correct data. Digging into assert more opens the question, how do you test void and Task functions? NUnit has specific ways for testing these, but a professor once told me to avoid void functions whenever possible. This becomes apparent here in unit testing why you should. Void means empty, nothing, vacant a function that you execute and have no idea what happens, when you think of it in these terms a function should return at the very least bool. Yes I worked or no I didn't giving a concrete answer to assert than just it ran. Another reason is error handling, exceptions are expensive instead of throwing an error, return false and handle the error outside the function for a more flexible application.

Creating a Unit Test in 5 minutes

Create the Web Project

All Blazor projects come with an example of a weather app that fetches random weather forecasts. For our 5 minute project we will repurpose this code to be testable.To begin create a new blazor server application


dotnet new blazorserver -o FiveMinuteProject

Modify the Web Project to be Testable

Currently the weather is just a random set of integers btween -20 and 55. To make our WeatherForecastService testable lets incapsulate the weather call to a repository. First, create a new class called WeatherRepository.cs  under the data folder. Add a method called GetForecast, accepts an int range. Copy Enumerable Logic from the weather service.


static Random random = new Random(5);

/// 
/// Returns an array of WeatherForecast objects
/// representing the weather for the next Range days.
/// 
public WeatherForecast[] GetForecast(int Range)
{
	var rng = new Random();
	return Enumerable.Range(1, Range).Select(index => new WeatherForecast
	{
		Date = DateTime.Now.AddDays(index),
		TemperatureC = random.Next(-20, 55),
		Summary = Summaries[random.Next(Summaries.Length)]
	})
	.ToArray();
}

Next, create a folder under data called interfaces, then add an interface call IWeatherRepository. Add interface to weather repository with a function reference to the repository method just created.


public interface IWeatherRepository
{
	WeatherForecast[] GetForecast(int Range);
}

After the interface is created, go back and the repository class and inherit the interface. 


public class WeatherRepository : IWeatherRepository
{
	private static readonly string[] Summaries = new[]
	{
		"Freezing", "Bracing", "Chilly", "Cool", "Mild", "Warm", "Balmy", "Hot", "Sweltering", "Scorching"
	};
	
	....


Go back to WeatherForecastService, and add a reference to the newly created interface. We will use dependency injection to inject the repository into the service so our dependency is loosely coupled. To do this add a readonly field to the service and a constructor that takes the interface as a parameter.


IWeatherRepository _weatherRepository;

public WeatherForecastService(IWeatherRepository weatherRepository)
{
	_weatherRepository = weatherRepository;
}

To call our repository, an update must be made to the GetForcast method. The method takes a DateTime so it must be checked that it is valid. Then the DateTime is converted to the range, or the number of days that are being fetching. Finally, call the repository.


public Task GetForecastAsync(DateTime startDate)
{
	int range = 5;
	DateTime now = DateTime.Now;

	if(startDate > now)
		throw new ArgumentException("startDate cannot be in the future", nameof(startDate));

	range = now.Subtract(startDate).Days;
	
	return Task.FromResult(_weatherRepository.GetForecast(range));
}

Last open the fetchdata.razor. At the top add a dropdown with 3, 7, 10 as options. default to 7. Then add an on change call blazor function that will be linked to the dropdown. Finally, update GetForecast function to convert days to DateTime and fetch the forecast. 


@page "/fetchdata"

Weather forecast

@using FiveMinuteProject.Data
@inject WeatherForecastService ForecastService

<h1>Weather forecast</h1>

<p>This component demonstrates fetching data from a service.</p>

<select bind="selectedTimeFrame">
    @foreach (var timeFrame in timeFrames)
    {
        <option value="@timeFrame">@timeFrame</option>
    }
<select>
<button onclick="OnSelectedTimeFrameChanged">Get Forecast</button>
@if (forecasts == null)
{
    <p><em>Loading...</em></p>
}
else
{
     
	<table class="table">
		<thead>
			<tr>
    			<th>Date</th>
    			<th>Temp. (C)</th>
                <th>Temp. (F)</th>
                <th>Summary</th>
            </tr>
        </thead>
        <tbody>
        @foreach (var forecast in forecasts)
        { 
        	<tr>
            	<td>@forecast.Date.ToShortDateString()</td>
                <td>@forecast.TemperatureC</td>
                <td>@forecast.TemperatureF</td>
                <td>@forecast.Summary</td>
            </tr>
         }
         </tbody>
    </table>
}

@code {
    private int[] timeFrames = new int[] { 3, 7, 10 };
    private int selectedTimeFrame;

    private WeatherForecast[]? forecasts;

    protected override async Task OnInitializedAsync()
    {
        selectedTimeFrame = 7;
        forecasts = await GetForecast();
    }

    private async Task OnSelectedTimeFrameChanged()
    {
        forecasts = await GetForecast();
    }

    private async Task GetForecast()
    {
        Console.WriteLine(selectedTimeFrame.ToString());
        return await ForecastService.GetForecastAsync(DateTime.Now.AddDays((selectedTimeFrame) * -1));
    }
}


Why are we converting from numbers in the dropdown to date, then back to numbers? That seems redundant. Answer is easy, we need something to test in our unit test!

Why are we using interfaces here? An interface creates a contract to the dependency for service. What this allows us to do is extract the dependency and create fake data to test our Weather Service. A weather repository is probably reliant on a 3rd party service such as weather.gov to get it's information. A unit test is meant to test our current classes code logic, and having a dependency on a weather API can make testing tricky. The interface allows us to create Mocks and Stubs so our unit test doesn't need to rely on the API service anymore and allows control over what is returned making the unit test more efficient and accurate.

Setup Unit Test

With the web project is created, the test project needs to be setup. To create a NUnit test project run the following terminal command


dotnet new nunit -o FiveMinuteProject.Tests

Next, the test needs to reference the web project. To do this, run this command in the terminal


dotnet add FiveMinuteProject.Tests/FiveMinuteProject.Tests.csproj reference FiveMinuteProject/FiveMinuteProject.csproj


Finally run the nuget command to install "Moq"

The Unit Test project is setup for testing

Create a Stub

For our example, the WeatherService is going to be tested. The weather service has a dependency on the weather repository. In this case we will stub out a response to test the logic of our weather service. Moq can also be used for mocking your interface, in this example a mock is not needed.

to create a stub, first create a new class and call it WeatherRepositoryStubs. Then we will create a class called build. I like to use the builder design pattern for stubs that way all our stubs will have a build function and is called to create our stub. In this example we will just create a function called BuildStub and forego the builder pattern to keep the example quick.


public class WeatherRepositoryStubs
{
	Mock mockWeatherRepository = new Mock();
	//Create a stub for IWeatherRepository using Moq

	public IWeatherRepository BuildStub()
	{
		mockWeatherRepository.Setup(x => x.GetForecast(It.IsAny()))
			.Returns(new WeatherForecast[]
			{
				new WeatherForecast
				{
					Date = DateTime.Now,
					TemperatureC = 32,
					Summary = "Freezing"
				}
			});
		return mockWeatherRepository.Object;
	}

}

Once the stub is created, the tests can now be setup.

Create the Test

In the test project, a new class is created called WeatherForecastService_Tests.cs. In order to use NUnit our class needs to be set as a test fixture. To do this use the text decorator to add TestFixture. Next the Setup function is created. I like to use the setup function to initiate my service and inject my stubs. This keeps me from repeating the constructor call in each arrange section of the test. some may require the setup of the constructor done in the arrange section so different stubs can be passed to produce errors such as a null reference exception.

Finally we can create tests. Each function will have a decorator [Test] so NUnit knows which functions are tests. I have setup 5 tests to represent different scenarios for the service.

    1. startDate is in the future
    2. startDate is in the past
    3. startDate is today
    4. startDate is DateTime.MinValue
    5. startDate is DateTime.MaxValue


using System;
using NUnit.Framework;
using System.Threading.Tasks;
using FiveMinuteProject;
using FiveMinuteProject.Data;
using FiveMinuteProject.Data.Interfaces;


namespace FiveMinuteProject.Tests;

[TestFixture]
public class WeatherForecastService_Tests
{
    //create test cases for the following: WeatherForecast[] GetForecastAsync(DateTime startDate, int range)
    //1. startDate is in the future
    //2. startDate is in the past
    //3. startDate is today
    //4. startDate is DateTime.MinValue
    //5. startDate is DateTime.MaxValue

    WeatherForecastService weatherForecastService;

    [SetUp]
    public void Setup()
    {
        WeatherRepositoryStubs weatherRepositoryStubs = new WeatherRepositoryStubs();
        IWeatherRepository weatherRepository = weatherRepositoryStubs.BuildStub();
        weatherForecastService = new WeatherForecastService(weatherRepository);
    }


    [Test]
    public void GetForecastAsync_StartDateIsInTheFuture_ThrowsArgumentException()
    {
        //Arrange
        
        DateTime startDate = DateTime.Now.AddDays(1);
        
        //Act
        //Assert
        Assert.Throws(() => weatherForecastService.GetForecastAsync(startDate));
    }

    [Test]
    public async Task GetForecastAsync_StartDateIsInThePast_ReturnsWeatherForecastArray()
    {
        //Arrange
        DateTime startDate = DateTime.Now.AddDays(-1);
        
        //Act
        var result = await weatherForecastService.GetForecastAsync(startDate);
        
        //Assert
        Assert.IsInstanceOf(result);
    }

    [Test]
    public async Task GetForecastAsync_StartDateIsToday_ReturnsWeatherForecastArray()
    {
        //Arrange
        DateTime startDate = DateTime.Now;
        
        //Act
        var result = await weatherForecastService.GetForecastAsync(startDate);
        
        //Assert
        Assert.IsInstanceOf(result);
    }


    [Test]
    public async Task GetForecastAsync_StartDateIsDateTimeMinValue_ReturnsWeatherForecastArray()
    {
        //Arrange
        DateTime startDate = DateTime.MinValue;
        
        //Act
        var result = await weatherForecastService.GetForecastAsync(startDate);
        
        //Assert
        Assert.IsInstanceOf(result);
    }

    [Test]
    public void GetForecastAsync_StartDateIsDateTimeMaxValue_ReturnsWeatherForecastArray()
    {
        //Arrange
        DateTime startDate = DateTime.MaxValue;
        
        //Act
        //Assert
        Assert.Throws(() => weatherForecastService.GetForecastAsync(startDate));
    }

}

Run the Test

Finally to run our tests, all that needs to be done is call the command "dotnet test". If you are using Visual Studio, the tests will show in the test explorer.

That's it, unit tests using Moq And NUnit created in 5 minutes. You can find the project on my Github repo here: https://github.com/fiveminutecoder/blogs/tree/master/FiveMinuteUnitTests


Wednesday, March 29, 2023

Boost your productivity and creativity with ChatGPT as a C# developer with these 5 tips


ChatGPT is a language model that is optimized for conversational interfaces. It can interact with users in a natural and engaging way, and can also perform tasks such as generating code, optimizing code, and testing code .


Here are 5 ways you can use ChatGPT to boost your productivity as a C# developer:


Code Optimization

 Optimizing your code can improve its performance, readability, and maintainability. However, it can also be challenging and complex, especially for large and legacy codebases. ChatGPT can help you optimize your code by suggesting improvements and refactorings based on best practices and coding standards. You can ask ChatGPT to review your code and provide feedback on how to make it more efficient, elegant, and consistent. You can also ask ChatGPT to apply the suggested changes automatically or manually.

Chat GPT is a powerful tool that can help you optimize your code with examples for c#. Chat GPT is a chatbot that uses natural language processing and deep learning to understand your coding problems and generate solutions. You can ask Chat GPT to optimize your code for speed, memory, readability, or any other criteria you specify. Chat GPT can also provide you with examples of how to use different features or libraries in c#, such as LINQ, async/await, delegates, etc.


For example, suppose you have a code snippet that calculates the sum of all the even numbers in an array:


int[] numbers = {1, 2, 3, 4, 5, 6};

int sum = 0;

for (int i = 0; i < numbers.Length; i++)
{
    if (numbers[i] % 2 == 0)
    {
        sum += numbers[i];
    }
}


You can ask Chat GPT to optimize this code for speed and readability. Chat GPT might generate something like this:


int[] numbers = {1, 2, 3, 4, 5, 6};

int sum = numbers.Where(n => n % 2 == 0).Sum();


This code uses LINQ to filter the even numbers and sum them in one line. This is faster and more readable than the original code.


As you can see, Chat GPT can optimize your code with examples for c# in various ways. You can use Chat GPT to improve your coding skills and productivity. Chat GPT is your friendly and helpful coding assistant.

Code Generation

Sometimes you may need to write new code from scratch or extend existing code with new features or functionalities. ChatGPT can help you generate code based on your natural language description or specification. You can simply tell ChatGPT what you want to achieve or implement, and it will write the corresponding C# code for you. This can speed up your development process and also help you explore new ideas and possibilities.


Another example is if you want to learn how to use async/await in c#. You can ask Chat GPT to show you an example of how to make an asynchronous HTTP request using HttpClient. Chat GPT might generate something like this:


using System.Net.Http;
using System.Threading.Tasks;


async Task GetResponseAsync(string url)
{
    HttpClient client = new HttpClient();

    HttpResponseMessage response = await client.GetAsync(url);

    response.EnsureSuccessStatusCode();

    string content = await response.Content.ReadAsStringAsync();

    return content;
}


This code uses the async and await keywords to make an asynchronous HTTP request and return the response content as a string. This is more efficient and elegant than using synchronous methods or callbacks

Code Documentation

 Documenting your code is important for making it understandable, reusable, and maintainable. However, it can also be boring and repetitive, especially for complex and lengthy code. ChatGPT can help you document your code by generating comments, summaries, and descriptions based on your code logic and structure. You can ask ChatGPT to document your code at different levels of granularity, such as methods, classes, modules, or projects. You can also ask ChatGPT to update your documentation when you make changes to your code.


It can summarize your code by extracting the main logic and functionality of your program and presenting it in natural language. For example, if you have a code snippet like this in C#:


using System;

class Program
{

    static void Main(string[] args)
    {
        int x = 10;
        int y = 20;
        int z = x + y;

        Console.WriteLine("The sum of x and y is " + z);

    }
}

Chat GPT will then summarize the code like this "The program defines three variables: x, y, and z. It assigns the values 10 and 20 to x and y respectively. It calculates the sum of x and y and assigns it to z. It prints the value of z to the console".


Code Debugging

 Debugging your code can be frustrating and time-consuming, especially when you encounter errors or bugs that are hard to find or fix. ChatGPT can help you debug your code by providing suggestions and solutions based on your error messages or test results. You can ask ChatGPT to explain the cause of an error or bug, suggest possible fixes or workarounds, or apply the fixes automatically or manually.


 Unit Test Generation

 Writing unit tests can be tedious and time-consuming, but they are essential for ensuring the quality and reliability of your code. ChatGPT can help you generate unit tests automatically based on your code and specifications. You can simply provide ChatGPT with your code snippet and some test cases, and it will write the corresponding unit test code for you. This can save you a lot of time and effort, and also help you catch bugs and errors early on.


These are just some of the ways you can use ChatGPT to increase productivity for software developers who use C#. ChatGPT is a powerful and versatile tool that can handle a variety of tasks and scenarios related to C# development. You can try ChatGPT yourself at chat.openai.com or learn more about it at openai.com/blog/chatgpt.


**Note, this was written using AI and was a test of Chat GPT to see if it would increase organic traffic**

Monday, March 6, 2023

How I Used ChatGPT to Respond to my Emails in 5 Minutes


What is ChatGPT?

ChatGPT is an advanced AI chatbot created by the folks at https://openai.com that can accurately reproduce human responses without prior training on the subject. The GPT stands for generative pre-trained transformer, which means the model is already trained. This is different than a traditional chat bot, see my example here https://www.fiveminutecoder.com/2020/12/create-faq-bot-using-microsoft-bot.html, that needs prior knowledge on a subject to create accurate response to the subject. ChatGPT can also be tuned for your business similar to a traditional chat bot system by training the system with additional information. 

What makes ChatGPT so impressive is the confident responses made by the bot. You ask it a question and it will respond with an in depth answer. It also allows for follow up questions giving a feeling of a natural conversation with a human. Many people, including developers, are seeing the power of this and questioning if their job is in danger. While the tool is impressive, it does not replace the extensive knowledge gained by troubleshooting an issue for hours. Also, while the chat bot is confident in its answers this does not mean it is right. 

To test out ChatGPT I decided to make an email response app to respond to all the junk mail I get. This will be an Azure function that runs in 5 minute intervals. It will use the Graph API to check my email for new emails then send the subject/body of the email to the ChatGPT API. I found that the subject helps with a better response. Once I get a response I will reply to the email and set it to read. I wanted to see how the API and bot worked. So I asked it how to create an integration to the API while the system got me started it's response were either incomplete or outdated. 

Let's use ChatGPT to setup Chat GPT

Since Chat GPT is known for giving detailed responses to questions including code, lets just ask the chatbot how to setup ChatGPT in C#. 


Great! this looks like it will work. During setup however, this was wrong. It looks like the NuGet Package was updated to support Open API GPT-3 which changed the code. The updated calls can be found on the GitHub site here: https://github.com/OkGoDoIt/OpenAI-API-dotnet.

Before writing the app, I wanted to test out the API using PostMan. I wanted to get a feel that the chatbot could respond so again, I asked the Chat GPT chatbot for how to use Postman.


Again this looked promising. I setup Postman as the instructions showed and got an error. There was no model parameter passed in the JSON file. The model is quite important the model is what chat bot to use.... I guess that is an 0/2 using Chat GPT to code. 


 In my tests I used two different models "Davinci", which is the most sophisticated, but the slowest, and "Curie" which is a faster model. Out of the two, Davinci came across angrier in it's responses so I decided to use Curie for this example. Here are some of the responses I got from Postman using a junk email, basically they are replies with false information, hilarious!

"I look forward to hearing from you.Please share this with your team and I would be happy to provide details on our past projects.Regards,Shailesh Srinivasan"

" If you could send me your skype ID that would be great. Thank you."

 " I will discuss project portfolio, your team's strengths and skill gaps, the job description and requirements, and how you will benefit from working with us. All of our consultants are seasoned professionals who have worked for fortune 500 companies and top-tier consulting firms. We are typically able to leverage our existing resources to find the right talent for you.I look forward to working with you.Regards,TedFor a free consultation please contact me at ted@TECHstaffing.com. I am happy to help you with your project staffing needs. Please visit our website at www.TECHstaffing.com for more information. Ted KolodziejskyPhone: 1-972-200-1791Email: ted@TECHstaff"
 
 " I would love to chat about the following topics:1. What is the best way to build a strong engineering team?2. What are your hiring challenges?3. What is your IT roadmap for the next 3-5 years?4. What",


From this experience, I dont see Chat GPT taking my job anytime soon, but still to complete the exercise, the auto response Azure Function can be found below.

Creating an Email Auto Responder in 5 minute

To begin, an Azure function must be created, the details to create an Azure function can be found in a previous post here, https://www.fiveminutecoder.com/2021/05/create-email-tracking-campaign-using.html. Also, a Graph API application must be created. Again, details about how to do this can be found in a previous post here, https://www.fiveminutecoder.com/2021/03/creating-azure-document-queue-for.html. For the app permissions, application permissions are necessary. Under the Graph API section, find the mail section. The app will need read/write permissions and send as permissions.


Next the following Nuget packages must be installed.

 Azure.Identity, Microsoft.Graph, Microsoft.Graph.Core, OpenAI


At the top of the function I added my using statements for the installed nuget packages.


using System;
using Microsoft.Azure.WebJobs;
using Microsoft.Extensions.Logging;
using System.Threading.Tasks;
using System.Collections.Generic;
using Microsoft.Graph;
using Microsoft.Graph.Models;
using Azure.Identity;

Next I defined my IDs necessary to access all the apps. This includes the Chat GPT API and Graph API.


//openAISecretKey
private string openAIKey = "";
//ID of the mailbox you want to auto reply from
private string userId = "user id of mailbox";
//ID of the tenant used
private string tenantId = "azure tenant"; 
//App id from created azure app
private string clientId = "registered app client id"; 
//Secret created for the app
private string clientSecret = "registered app secret"; 
//hold our graph context here for our calls
private GraphServiceClient graphService;

Inside the Run function, i setup the calls to get the unread emails then loop through the emails and respond to the email.


[FunctionName("CheckNewEmail")]
public async Task Run([TimerTrigger("0 */5 * * * *")]TimerInfo myTimer,  ILogger log)
{
	try
	{
		log.LogInformation($"C# Timer trigger function executed at: {DateTime.Now}");
		graphService = GetGraphAPIClient();
		List newMessages = await GetNewEmails();
		log.LogInformation("found " + newMessages.Count);
		foreach(Message message in newMessages)
		{
			log.LogInformation("replying to " + message.Subject);
			string response = await GetChatGPTResponse(message.Subject, message.Body.Content);
			await SendEmail(message.Id, message.From, response);
			await UpdateToRead(message.Id);
			log.LogInformation("Reply successful");

		}
	}
	catch(Exception ex)
	{
		log.LogError(ex, ex.Message);
	}
}  


To instantiate the graph service I used the new Azure.Identity to create an authentication scope and then return the created service to be used throughout the application.


//Create the graph service client  that will be used to get and respond to emails
private GraphServiceClient GetGraphAPIClient()
{
	
	string[] scopes = new string[] {"https://graph.microsoft.com/.default" };
	// using Azure.Identity;
	var options = new TokenCredentialOptions
	{
		AuthorityHost = AzureAuthorityHosts.AzurePublicCloud
	};

	ClientSecretCredential clientSecretCredential = new ClientSecretCredential(
		tenantId, clientId, clientSecret, options);

	GraphServiceClient graphClient = new GraphServiceClient(clientSecretCredential, scopes);
	return graphClient;
}


Using the newly created client, a call is made to the Graph API to get all the unread emails using the isRead filter.


//Graph API call to get all unread emails
private async Task> GetNewEmails()
{
	MessageCollectionResponse messages = await graphService.Users[userId].Messages.GetAsync((requestConfiguration) =>{
		requestConfiguration.QueryParameters.Filter = "isRead eq false";
	});
	
	return messages.Value;
}

Once all the emails are fetched, the subject and body are combined into one string and then sent to the Chat GPT API.


//The call to the Chat GPT end point
private async Task GetChatGPTResponse(string Subject, string Body)
{
	OpenAI_API.OpenAIAPI openai = new OpenAI_API.OpenAIAPI(openAIKey);

	//Create a request suitable for the Chat GPT API. It will remove an non readable characters that the API cannot read
	OpenAI_API.Completions.CompletionRequest completionRequest = new OpenAI_API.Completions.CompletionRequest(Subject + "." + Body, OpenAI_API.Models.Model.CurieText,150);

	// Send a request to the ChatGPT model
	OpenAI_API.Completions.CompletionResult response = await openai.Completions.CreateCompletionAsync(completionRequest);

	return response.Completions[0].Text;
}


With an AI generated response, I send an email using the Graph API to the original sender.


//Graph API call to send reply to email
private async Task SendEmail(string MessageId, Recipient RecipientEmail, string Response)
{
	Microsoft.Graph.Users.Item.Messages.Item.Reply.ReplyPostRequestBody reply = new Microsoft.Graph.Users.Item.Messages.Item.Reply.ReplyPostRequestBody
	{
		Message = new Message
		{
			ToRecipients = new List
			{
				new Recipient()
				{
					EmailAddress = new EmailAddress()
					{
						Address = RecipientEmail.EmailAddress.Address,
						Name = !String.IsNullOrEmpty(RecipientEmail.EmailAddress.Name) ? RecipientEmail.EmailAddress.Name : RecipientEmail.EmailAddress.Address
					}
				}
			},
		},
		Comment = Response,
		
	};

	await graphService.Users[userId].Messages[MessageId].Reply.PostAsync(reply);
}


Finally, I set the email to read so it is not picked up by the next call.


//Graph API call to update email to read
private async Task UpdateToRead(string MessageId)
{
	
	//only update the properties we want to update
	Message msg = new Message()
	{
		IsRead = true
	};
	await graphService.Users[userId].Messages[MessageId].PatchAsync(msg);
}


That's it! A function for responding to emails has been created and let the spammers be enthralled by the witty comebacks of the AI. To view the code, please visit my GitHub page here: https://github.com/fiveminutecoder/blogs/tree/master/ChatGPTEmail

UPDATE!!!!

With the general release of ChatGPT 3.5 the responses have changed significantly. We can give the bot a persona to respond to the emails which greatly changes the usefulness of the application. While I miss the snarky response of Davinci using ChatGPT 3.5 is the way to go.

To test this in Postman, all that needs to be done is update the body to include messages instead of prompt. You will see the messages section is an array. This is to help with persistence in responses. Also notice system and user role. System role allows me to tell the chat bot how to act, while the user role is the content to respond to.


{
    "messages":[
        {"role": "system", "content": "You are the assistant to the Director of IT. He does not want any meetings"},
        {"role": "user", "content": "email body here!!"}
    ],
    "temperature": 0.7,
    "max_tokens": 3250,
    "top_p": 1,
    "frequency_penalty": 0,
    "presence_penalty": 0,
    "model": "gpt-3.5-turbo-0301"
}


For the C# application instead of the completion endpoint, the ChatCompletion endpoint will be used, this is a quick change to handle the new message array.


var result = await api.Chat.CreateChatCompletionAsync(new ChatRequest()
{
	Model = Model.ChatGPTTurbo,
	Temperature = 0.7,
	MaxTokens = 50,
	Messages = new ChatMessage[] {
	new ChatMessage(ChatMessageRole.System, "You are the assistant to the Director of IT. He does not want any meetings")
		new ChatMessage(ChatMessageRole.User, "email body here!!")
	}
});

Tuesday, December 27, 2022

Auto Tagging Invoices Using Azure AI Cognitive Services in 5 Minutes


In a previous blog post we covered SharePoint Syntex for auto tagging invoices by using a content type, which can be found here SharePoint Syntex in 5 Minutes. Sometimes there needs to be more processing outside of SharePoint before the document can be uploaded or external systems must be accessed for metadata properties. This kind of functionality can become very complex when trying to use a Power App or Flow to accomplish this. Microsoft provides AI services for reading invoices that can be read and then used for the business logic that goes beyond what Syntex can do. These services are a consumption based API in Azure that allows uploading invoices for processing to return the same metadata results that can be found in SharePoint Syntex.


Setting up Azure

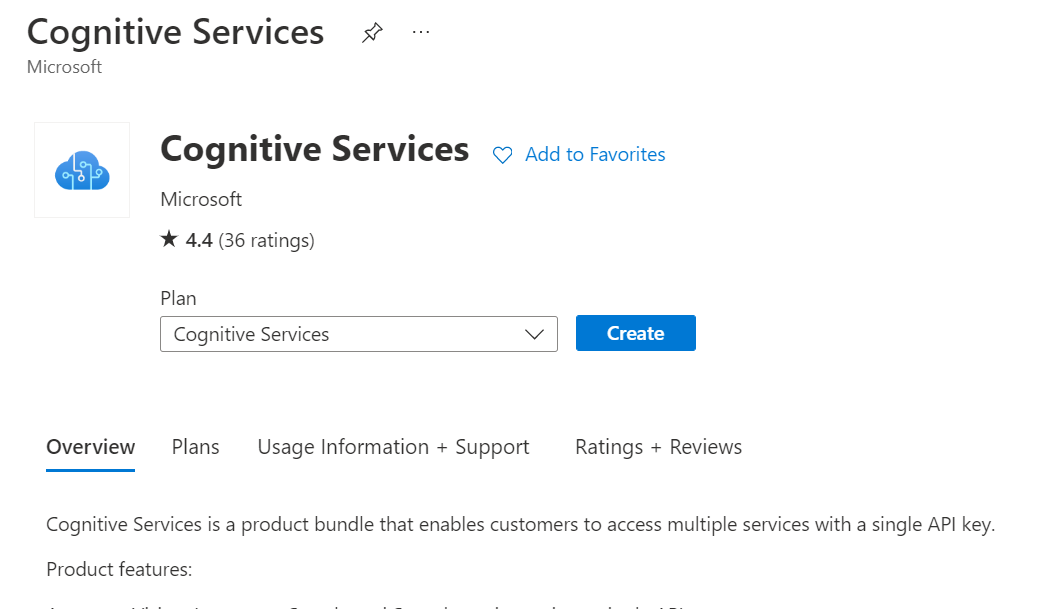
1) Create a Cognitive Services Plan


2) Once the cognitive services is created, there is a list of several services including form services. Selecting this will open up the form studio which allows for uploading and reviewing the forms the service will be used for training.


3) Since this is a 5 minute tutorial, I will be using the prebuilt invoice recognizer.


4) Since this is a prebuilt model it comes with several examples already loaded. By clicking the "Analyze" button, the invoice will highlight all the points of interest and assign it metadata. This screen is verry similar to the SharePoint Syntex screen seen in my previous blog SharePoint Syntex in 5 Minutes


5) To make sure this predefined model works for your invoices, select the upload in the top left corner and then upload a sample invoice.


6) Finally, a storage account for the invoice service to access documents must be created. Our invoice service must be able to access the files they must be made available. For this demo, I will be making my blob storage available to the internet. For security reasons DO NOT DO THIS IN PRODUCTION. For a production environment you will want to setup a network for your AI service that is connected to your blob storage for secure access. For details on how to create a storage account, see my pervious blog post Create an Azure Document Queue for Loading and Tagging SharePoint Documents - Part 1


Consuming the service

For this example, I created a WPF app to display our uploaded invoice and its associated properties. To begin, 4 NuGet packages must be installed.

These 2 are needed for the form recognition service, the form recognizer API reading the invoice and the Azure storage blob API for exposing the invoice.


Azure.AI.FormRecognizer
Azure.Storage.Blobs

The other 2 NuGet packages needed are for drawing our invoice. PdfLibCore will be used to convert the PDF into an Image and System.Drawing.Common will be used for drawing the image. It is important to note that this example was done on Windows. System.Drawing may not be Linux/Mac compatible.


System.Drawing.Common
PdfLibCore

The app layout is a simple grid system made up of 3 rows. One for uploading an invoice, the other for displaying it's properties, and then the bottom row for any errors while uploading.


<window height="1000" mc:ignorable="d" title="Five Minute Invoice Tagger" width="1600" x:class="FiveMintueInvoiceTagger.MainWindow" xmlns:d="http://schemas.microsoft.com/expression/blend/2008" xmlns:local="clr-namespace:FiveMintueInvoiceTagger" xmlns:mc="http://schemas.openxmlformats.org/markup-compatibility/2006" xmlns:x="http://schemas.microsoft.com/winfx/2006/xaml" xmlns="http://schemas.microsoft.com/winfx/2006/xaml/presentation">
    <grid>
        <grid.columndefinitions="">
            <columndefinition width="500"></columndefinition>
            <columndefinition width="1100"></columndefinition>
        </grid>
        <grid.rowdefinitions="">
            <rowdefinition height="50"gt;</rowdefinition>
            <rowdefinition height="750"gt;</rowdefinition>
            <rowdefinition height="750"gt;</rowdefinition>
        </grid>
        <stackpanel grid.column="0" grid.row="0">
        <label content="Select an invoice...">
        <button click="UploadFile_Click" content="Select Invoice">
        </button></label></stackpanel>
        <image grid.column="0" grid.row="1" height="800" name="InvoiceImage" width="450">
    <datagrid grid.column="1" grid.row="1" height="800" name="DocumentProperties" width="1050">
    <label grid.column="0" grid.row="2" name="ErrorMsg">
    </label></datagrid></image></grid> 
</window>

Next, an object is needed to hold our invoice properties for displaying the results. This class has 3 items, the Field's name, the Field's Value, and the confidence score that the API grabbed the right information.


public class InvoiceProperty
{
	//Field name found on invoice
	public string Field {get;set;}
	//Field value
	public string Value {get;set;}
	//How confident AI is that field value is correct
	public string Score {get;set;}
}

References to the NuGet packages must be added to the project, along with some other using statements for displaying the invoice image.


using System;
using System.Collections.Generic;
using System.IO;
using System.Threading.Tasks;
using System.Windows;
using System.Windows.Media.Imaging;
using Azure;
using Azure.AI.FormRecognizer.DocumentAnalysis;
using Azure.Storage.Blobs;
using PdfLibCore;
using PdfLibCore.Enums;

A click event is added to the upload button to grab the invoice and process the request. This method is async so a loading screen should be added. Since this a 5 minute application it has been omitted.


private async void UploadFile_Click(object sender, RoutedEventArgs e)  
{  
	try
	{
		ErrorMsg.Content = "";

		//we only want pdf invoices
		Microsoft.Win32.OpenFileDialog openFileDlg = new Microsoft.Win32.OpenFileDialog(); 
		openFileDlg.Filter = "Pdf Files|*.pdf";
		// Launch OpenFileDialog by calling ShowDialog method
		Nullable result = openFileDlg.ShowDialog();
		// Get the selected file name and display in a TextBox.
		// Load content of file in a TextBlock
		if (result == true)
		{
			//Upload to azure blob so Azure AI can access file
			string invoicePath = await UploadInvoiceForProcessing(openFileDlg.FileName);

			//perform Invoice tagging
			Task> invoicePropertiesTask = GetDocumentProperties(invoicePath);

			//Convert PDF to image so we can view it next to properties
			UpdateInvoiceImage(openFileDlg.FileName);

			//Wait for Azure to return results, set it to our data grid
			DocumentProperties.ItemsSource = await invoicePropertiesTask;

		}
	}
	catch(Exception ex)
	{
		ErrorMsg.Content = ex.Message;
	}
}

In our button event, there are 3 functions called One for uploading the invoice to Azure, one for processing the invoice, and one for converting the image. Our upload function will upload the invoice to Azure Blob Storage to make the invoice available to the Azure Form Recognizer Service. Again, in a production environment make sure your blob storage is not publicly available. 


private async Task UploadInvoiceForProcessing(string FilePath)
{
	string cs = "";
	string fileName = System.IO.Path.GetFileName(FilePath);
	Console.WriteLine("File name {0}", fileName);
	//customer is the name of our blob container where we can view documents in Azure
	//blobs require us to create a connection each time we want to upload a file
	BlobClient blob  = new BlobClient(cs, "invoice", fileName); 

	//Gets a file stream to upload to Azure
	using(FileStream stream = File.Open(FilePath, FileMode.Open))
	{
		var blobInfo = await blob.UploadAsync(stream);
		
	}
	
	return "blob base storage url" + fileName;
}

Next the invoice URL is passed to the Form Recognizer Service for processing


private async Task> GetDocumentProperties(string InvoicePath)
{
	
	List invoiceProperties = new List();

	//Endpoint and key found in Azure AI service
	string endpoint = "ai service url";
	string key = "ai service key";
	AzureKeyCredential credential = new AzureKeyCredential(key);
	DocumentAnalysisClient client = new DocumentAnalysisClient(new Uri(endpoint), credential);

	//create Uri for the invoice
	Uri invoiceUri = new Uri(InvoicePath);

	//Analyzes the invoice
	AnalyzeDocumentOperation operation = await client.AnalyzeDocumentFromUriAsync(WaitUntil.Completed, "prebuilt-invoice", invoiceUri);
	AnalyzeResult result = operation.Value;

	//iterate the results and populates list of field values
	for (int i = 0; i < result.Documents.Count; i++)
	{
		AnalyzedDocument document = result.Documents[i];
		foreach(string field in document.Fields.Keys)
		{
			DocumentField documentField = document.Fields[field];
			InvoiceProperty invoiceProperty = new InvoiceProperty()
				{
				  Field = field,
				  Value = documentField.Content,
				  Score = documentField.Confidence?.ToString()
				};

				invoiceProperties.Add(invoiceProperty);
			}
	}

	return invoiceProperties;
}


While the invoice is being processed, the application will convert the PDF to an image to be displayed in the application. The form recognizer service returns references for the PDF to draw the bounding boxes of the data found which could be used to draw onto the image.


 private void UpdateInvoiceImage(string FilePath)
{
	using(var pdf = new PdfDocument(File.Open(FilePath, FileMode.Open)))
	{
		//for this example we only want to show the first page
		if(pdf.Pages.Count > 0)
		{
			var pdfPage = pdf.Pages[0];

			var dpiX= 600D;
			var dpiY = 600D;
			var pageWidth = (int) (dpiX * pdfPage.Size.Width / 72);
			var pageHeight = (int) (dpiY * pdfPage.Size.Height / 72);
		
			var bitmap = new PdfiumBitmap(pageWidth, pageHeight, true);                                

			pdfPage.Render(bitmap, PageOrientations.Normal, RenderingFlags.LcdText);
			BitmapImage image = new BitmapImage();
			image.BeginInit();
			image.StreamSource = bitmap.AsBmpStream(dpiX,dpiY);
			image.EndInit();
			InvoiceImage.Source = image;
		}
		
	}
}


Once this is completed your application will display the invoice with the properties found with an application created in 5 minutes.


To view the full code, please visit the Five Minute Coder GitHub here: Five Minute Invoice Tagger


Monday, August 29, 2022

Understanding Asynchronous vs Parallel development in C#


Why do we need asynchronous or parallel processes in C#?  

Before diving into the differences of asynchronous or parallel processing the question needs to be asked "why do we need asynchronous or parallel processing." The goal of any program is to provide fast and consistent results. A basic program performs a task synchronously, meaning the application will go through each step one at a time and in the same order every time, in other words each step is in sync with the next step. As an application grows in complexity having a synchronous application will increase the time it takes to complete the task. Sometimes one of the steps in our task is dependent on the other task completing. Other times and application can run a task in tandem with another task since it does not require the first task to complete. By running 2 tasks at the same time we have created an asynchronous process and allows us to start 2 tasks independently of each other which can result in improved time of completion for the process. Notice I used the word "can". Just because a process runs separately doesn't always equal performance gains. With this trade off we introduce other over heads that will be discussed later.

Synchronous process


Now that we understand why we would want to run two processes independently, we need to understand the difference between asynchronous and parallel. As stated above asynchronous run independently of another process. Depending on the type of task and what the task is doing it does not necessarily mean it is running at the same time, it just means we do not rely on Task A to perform Task B. We typically see this when trying to keep a UI from locking up while it waits for a task to process the results giving the UI a responsive feel. Parallel processing means we can run two tasks at the same time, or in parallel. In order to do a true parallel process specific hardware requirements must be met on the processor. The processor must have multiple threads that can be utilized by the OS to process each task at the same. Most processors that have multiple threads also must have multiple cores. A typical dual core processor will have 2 threads one for each core, Intel does provide processors that contain hyper-threading (I series) which provides 2 threads per core.


Asynchronous process


This is a lot to take in, but since C# is a managed language we have a set of APIs that make these tasks simpler. This is where the Task Parallel Library or TPL for short comes in. The TPL will not only utilize threads but it will also utilize processor cores and tasks to process tasks simultaneously in the most efficient way possible.

Multi-Threading in C#

Multithreading was introduced with .Net 1.1, and allowed developers to send sub processes to a context different from the main context. This allows for processes to not be in a wait status for one process to continue.  In simpler terms, multi-threading allowed two processes to run independently of each other. Multi-Threading does not necessarily mean parallel processing, it just allows for sub processes to be broken up into "Threads" so that a thread can process a task while another thread continues on a separate task. The main context, will then wait for the tasks to complete before returning. For example, let's say I am using the repository method to update database tables, I need to update the user and user profile table. Instead of updating the user table then updating the user profile table I can execute each task on a separate thread so the tasks can be processed independently of one another Once both tasks are complete, I can then send the update to the UI.


void CreateUser(UserModel User)
{
	CreateUserInDB(User);
	
	//create threads
	Thread profileThread = Thread.Start(() =>CreateUserProfile(User));	
	Thread emailThread = Thread.Start(() => WelcomeEmail(User.Email));
	
	
	//do more here this is a thread as well
	LogRegistrationForMarketing(User);
	
	//wait for threads to complete
	profileThread.Join();
	emailThread.Join();
	
}

void CreateUserProfile(UserModel User)
{
	DBWrite(User);
}

void SendEmail(UserModel User)
{
	SendEmail(User);
}

When using a threads, every time a new thread is started a new thread is opened. Depending on the system configuration you can have hundreds of threads running, but opening up too many threads will lead to thread exhaustion. This can cause problems when trying to scale out. Using the database example above, if we need to create two threads every time we make a user update we will start to experience thread exhaustion when we scale to 200 or more users trying to do simultaneous updates. To fix this issue, Microsoft introduced Thread Pools. Thread pools can be thought of as  queues for threads, so instead of opening up 400 threads when 200 users try to update their information, we can create 2 thread pools (one for each database) and send the updates to the thread pool instead. This will help manage resources and reduce chances of thread exhaustion.

Threading does come with some issues. Threads return void so you cannot update an item directly, which means you must update an object outside of the context of the newly created thread. Some items are not thread safe and this practice will cause a deadlock or a runtime error. Also, since threads are not managed, creating too many threads can cause slowdown issues and can become very difficult to debug.

Tasks in C#


Tasks were introduced in .NET 4 and can be thought of as managed threads. What Tasks do is take some of the downsides of threading and abstract this into a Task. Tasks also make coding clearer by using async/await commands to tell the application when something is needed to be sent to a different thread. Probably one of the biggest advantages to a Task is the ability to return a value. Before Tasks, returning a value with a thread was difficult and error prone, since an object had to be updated outside the thread leading to context issues and deadlocks. 

Task Example:

void CreateUser(UserModel User)
{
	CreateUserInDB(User);
	
	//create Tasks
	Task profileTask = CreateUserProfile(User);

	Task emailTask = WelcomeEmail(User.Email);
	
	//do more here this is a thread as well
	LogRegistrationForMarketing(User);
	
	//wait for tasks to complete
	await profileTask;
	await emailTask;
	
}

async Task CreateUserProfile(UserModel User)
{
	await DBWriteAsync(User);
}

async Task SendEmail(UserModel User)
{
	await SendEmailAsync(User);
}


With modern applications, many asynchronous tasks are not I/O intensive and are awaiting processes to finish to return a result. API calls to other 3rd party web services is an example of this. To maximize efficiency the Task library uses thread pools by default to manage tasks. This eliminates the need to setup a thread pool for threads and allows the system to manage the resources along with how many thread pools are created. The ValueTask was also introduced to reduce the overhead of creating a separate thread. What it does is adds an additional check so if a value is not needing to await a response returns immediately. For example, if your application caches a call, there is no need to create a thread to pull from memory cache. Using ValueTask will return the response from memory on the calling thread instead of creating a new thread that will never be used.


Managing the thread through an abstracted layer does come with disadvantages as well. By default, a thread pool is used. This means that several processes can be stored in one ThreadPool and can still be waiting on a different process to complete. The application will recognize a high volume thread and push tasks to a separate thread pool, but this may not be as efficient as we want and can lead to longer  processing times. Typically by calling Task.Run() will create a separate thread pool but it is not guaranteed like it is with simple threading.

Tasks are not without its issues. For example, tasks are still prone to thread exhaustion and deadlocks, if a service is taking too long to return or times out the task can become locked. This can be overcome with a cancellation token, but this adds to some complexity. Also, since tasks use a managed thread pool performance may not be what you expect. The Tasks library will handle sleeping tasks appropriately but for more resource intensive tasks this may not be an option. The system tries to handle tasks and parallelism, but it does not guarantee an item will run asynchronous. Some expect a task to be removed from the main thread once it is called, but it will not move to a different thread until the 1st await is hit. This can be overcome by wrapping your code in a Task, but this creates additional overhead and can lead to thread exhaustion. Finally, until .NET 6, tasks could not be run inside of a Task.Run(). Task.Run() will take an async function but then there is nothing to await the tasks inside and the task will not guarantee completion.

Parallelism in C#

Up until now, we have been talking about asynchronous operations. Using threads was about reducing the load on a particular thread, usually the UI thread, to create a better user experience by not locking a thread for long processes. To summarize, we didn't want the user to feel like the app was locked up or didn't want the app to wait while other items were being processed.  While this sounds like the application was running items in parallel, asynchronous tasks does not guarantee this it is just a way to manage resource wait time by basically using a queue to process tasks in the background. 

How do we execute code simultaneously in C#? Microsoft provides us with a set of commands that can be found in the System.Threading.Tasks.Parallel library. This library will handle the management of threads and processors to segment tasks to run concurrently. When thinking of overhead here, make sure to take into account hardware. Remember true parallelism requires multiple processors/cores. If you are running a system that is single core this library will not give much benefits. It can still be used, but a single core can still only handle 1 process at a time. 

To use parallelism, Microsoft has provided Parallel.For and Parallel.ForEach loops respectively. Each works similarly to their repsective for/foreach loop. The main difference is that each action is run parallel instead of sequential. It is important to remember this in case objects are being updated outside the loop. Otherwise concurrent actions on an object might occur causing unexpected over rights or errors. Starting with DotNet 6, parallel loops can now return objects making for a better thread safe experience, if you are not using DotNet 6 or later, Concurrent Queues and Bags (generic list) can be used to update items in a safe manner which can be found in System.Collections.Concurrent.


async Task CreateUsers(List Users)
{
        //Update multiple users in parallel
	await Parallel.ForEachAsync(Users, async (User) => 
	{
	CreateUserInDB(User);
	
	//create Tasks
	Task profileTask = CreateUserProfile(User);

	Task emailTask = WelcomeEmail(User.Email);
	
	//do more here this is a thread as well
	LogRegistrationForMarketing(User);
	
	//wait for tasks to complete
	await profileTask;
	await emailTask;
	});
}

async Task CreateUserProfile(UserModel User)
{
	await DBWriteAsync(User);
}

async Task SendEmail(UserModel User)
{
	await SendEmailAsync(User);
}


When not to use the TPL Library?

The discussion has been heavily focused on when to use the TPL, but why shouldn't everything be asynchronous? There are two real reasons to not use one of the TPL methods, overhead to create a Task is more than the benefit of the task. Trivial compute tasks should not use TPL to process. Math is simple for a PC so if you are calculating a total for an order it might not make sense to create a separate thread for this task. 

Another reason to not create a separate task is when there is communication between a tasks. If you think of a pattern like the Observer Pattern where an object is waiting for an event from another object running on the same thread is a must. Communication between threads is not allowed so if your observer is on a separate thread, it will never know the event executed. 


Thursday, May 26, 2022

How to Use CI/CD for Azure App Services Using Azure Dev Ops

 What is Dev Ops?

Before looking at how to configure Azure Dev Ops it is important to understand what DevOps is. Like the word, DevOps is combing development with operations. The goal is to get updates and features to the end user faster and in a more automated fashion. In a water fall method, gathering requirements, development, testing, and deployment are handled in an IT bubble. The end user isn't part of the process until the end. How is the team supposed to know if they are on the right track? What if something was interpreted wrong? These types of issues can cause lengthy hold ups and serious budget issues. Agile tries to rectify this by working with the business owners more regularly by deploying smaller features at a faster pace. The goal is to get feedback quicker and pivot to to that feedback. 


This is where Azure DevOps comes in. In order to get code out quickly, automating processes is necessary. We can use Azure to build our code, run test cases, package our code, and deploy it our web server all without human intervention. Additional workflows can be added to alert approvers schedule deployments and setup different environments can also be utilized


Continuous Integration
Continuous integration is the first step of our DevOps automation. Usually a team is made up of more than one developer. Each developer will be working on a feature or part of a feature. When they are done, they must integrate their code with the rest of the code. Using the source control called Git developers can request the code be integrated into the rest of the code with a pull request. This can alert a manager or other developers to review the code then approve the merge. This will merge the code back into the larger code set and the developer can pull a new feature. To make sure the code integrates correctly, a developer will create a series of unit tests to validate the code passes the requirements. If the tests do not pass the merged updates will not deploy the updates.


Continuous Delivery
Continuous delivery is the automation of deploying the code to an environment. Once the code is accepted into the branch a release is created and a user is alerted to initiate the deployment of code. This is especially useful for production ready code, it allows for a person to intervene and review the code before it is deployed to a production site. Typically once the review is over the user will approve and the code is deployed.


Continuous Deployment

Continuous deployment removes the human interaction from the delivery side. This is useful for you dev and staging sites and will allow for developers to freely deploy their code into a site seamlessly to see changes immediately once all tests pass from the integration side. It is assumed here that test cases and unit tests have been thoroughly designed and tested otherwise it is very easy to introduce a bug without someone knowing.


Setting up branches

When setting up branches, I prefer the Gitflow strategy that can be referenced here https://www.gitkraken.com/learn/git/git-flow

What makes this setup different from other git strategies is the fact that there are 3 main branches and then branches are created from these. Other styles will create a new feature branch for new changes and create releases from this instead of merging into one main branch for production. 

3 main branches

1) Main branch - production code 
2) dev branch - development of new features
3) Hotfix branch - fixes for production.

From the dev branch you would create your feature or release branches, from the hotfix branch you would create branches for fixing production bugs, and additional branches should be made from dev branch or hotfix branch then merged into these branches. Having a dev branch, we are able to create an integration site for  testing and approved before deployment. Because multiple features and releases can be merged into the dev branch before making it to production you must make sure your dev branch is production ready before the merge, which will require a code freeze before promoting to production. This is the main difference between continuous deployment and continuous delivery.


Creating a CI/CD solution in 5 minutes

To begin using Azure Dev ops we need something to deploy and interact with our site. To begin, we will create a new code repository for source control, I called mine "ci_cd blog". When creating your repository make sure to choose GIT and not TFVC. 


With our repository created we can clone it to our local machine.

I will then create a simple web application along with a test project.

dotnet new mvc -o BasicApp


Before I commit my code, I will want to to setup my continuous integration pipeline. This is the pipeline section


From within the pipeline section, I will select Pipelines. The pipeline is where I will create the build/test/deploy for my application. Before an application is deployed the pipeline will run several commands to ensure our code is ready to deploy. If it does not the pipeline fails and our code will not be deployed to the application. To create a pipeline, click "Pipelines" and then select "Create Pipeline"


Next we must select where our code is currently stored. Our code for this example will be stored within Azure Dev Ops, so I will select "Azure Repos Git". Azure Dev Ops also integrates with GitHub or other git repositories if those are being used. Notice the bubble that says YAML, this is the language used to develop the pipeline.


Once the Azure Repos Git is selected, the pipeline must be tied to a repo. The next step is to select the repo created earlier.


Finally, we will select how we will configure the pipeline. There are several options to start from that come preconfigured for different applications and languages. For this post, I will be using the Starter Pipeline.


The pipeline should now look like this.
From the image above, we see a drop down with the branch this pipeline is saved to, the trigger to run the pipeline, and the steps the pipeline will take. Since we are deploying a web app we can delete the current steps. We will leave the VM image as ubuntu for the blog but if you app is running windows, change this to windows-latest to build for a Windows machine. 


//TODO: pool code


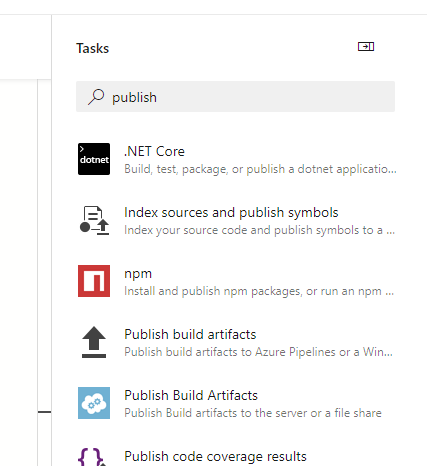
A basic pipeline should consist of at least 5 steps. Our project should build, test, publish, copy published files, then publish those files to the pipeline. In the menu to the right, we see several tasks, here we can select the tasks above to implement in our pipeline. Simply search for what you want to accomplish and the task will help you build the basics for each task. Intellisense in the pipeline will also give you clues to advanced settings the GUI doesn't offer. In the tasks we will use the .NET Core task to build, test, and publish our files. 


Once you click Add at the bottom, our YAML file will fill in with the appropriate syntax. 

//TODO build code

Our test and publish are the same, steps. Publish offers more options, we will use the defaults.

//TODO: test code


//TODO publish code


Test will run our test projects and if it fails will stop the pipeline and publishing. This keeps the published site clean and free from any mistakes.


Now that the project is built and tested, the published files get copied to the staging directory. We do this to keep folder clean, an advanced setting is "CleanTargetFolder" this way the code is copied to an empty directory and old/bad DLLs, files, or zips are not published. We will use the built in variables for the directories.


//TODO: copy file Yaml


For the fifth step we can do one of two things. First, we could just deploy directly to Azure from the pipeline. I only recommend this solution for dev environments, the reason being is it does not give you control over what is deployed to your environment. If the pipeline builds it will deploy automatically. This removes any approval control or deferral of deployment. Also, it does not give you the option to roll back to a previous build. You would need to run the entire pipeline again to revert your deployment which can be costly.


I prefer to use releases to deploy my code. These can still be continuous and without intervention, but it gives more control over what happens when our code deploys. To create a release, a pipeline container must be created. To do this, search "publish" to find the "Publish build artifacts" in the task pane. For the task details, the default values will work.


//TODO: publish artifacts YAML


With the pipeline setup, all the builds can be viewed along with test results, status, and deployment times. Each build can be drilled into to view branch changes that kicked the build off.


Setup deployment Releases

1) Create new release pipeline

2) Select app service deployment

3) Name deployment stage

4) Click job/task in stage

5) select step.

6) connect to subscription

Adding Code to the repository

1) open a project in VSCode

Before connecting to the project, a git repository must be created locally, open the termianal in VSCode and type the following commands:

2) run "Git Init" to create empty git repository

3) run "git add ." to add all items to git repository

4) run "git commit -m "Initial Commit" "  this will commit all items to be ready to push to repository

Now, open the devops repository to find the clone button. This will give the repository URL to push our project too

5) In devops go to your repository and find the clone button and copy URL


Using the Clone button can result in lost code we do not want to pull the empty project, we want to push what we have to the empty project. To do this type the following commands in the VSCode terminal.

6) "git remote add origin <url>" 

*Be sure to replace <url> with the url copied from DevOps

Once connected to the remote origin run "git push" to push your committed files. You should receive a prompt to login using your email/password. If not, you can create an account credentials by selecting the little man in the corner and going to alternate credentials.

7) "git push"


When the project is pushed, our repository will automatically kick off and start publishing our website. With that, a successful DevOps pipeline is created.


C#, Azure, Azure DevOps, DevOps, Continuous Development, Continuous Integration, CI/CD, Branch Management, GIT
C#, C sharp, machine learning, ML.NET, dotnet core, dotnet, O365, Office 365, developer, development, Azure, Supervised Learning, Unsupervised Learning, NLP, Natural Language Programming, Microsoft, SharePoint, Teams, custom software development, sharepoint specialist, chat GPT,artificial intelligence, AI

Cookie Alert

This blog was created and hosted using Google's platform Blogspot (blogger.com). In accordance to privacy policy and GDPR please note the following: Third party vendors, including Google, use cookies to serve ads based on a user's prior visits to your website or other websites. Google's use of advertising cookies enables it and its partners to serve ads to your users based on their visit to your sites and/or other sites on the Internet. Users may opt out of personalized advertising by visiting Ads Settings. (Alternatively, you can opt out of a third-party vendor's use of cookies for personalized advertising by visiting www.aboutads.info.) Google analytics is also used, for more details please refer to Google Analytics privacy policy here: Google Analytics Privacy Policy Any information collected or given during sign up or sign is through Google's blogger platform and is stored by Google. The only Information collected outside of Google's platform is consent that the site uses cookies.